How to Create a Report
Purpose: To explain the process of creating a report. Please also see the related video:
Creating a Report
Prerequisites: Novo initial software settings, Module configuration, Data within the area of Novo for which you are running a report.
Steps:
- Click Admin->Reports. The Report Writer Manage Reports page is now visible.
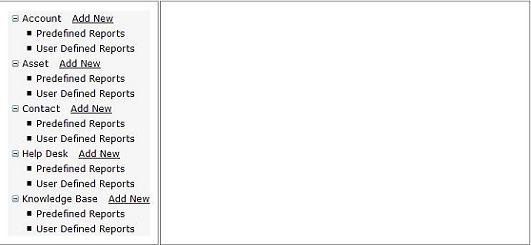
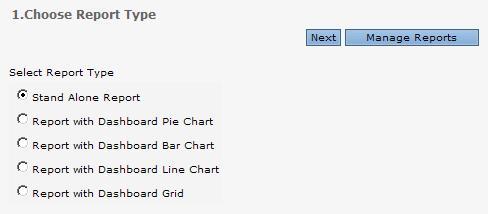
- Click Add New link next to the type of report you want to create. The Choose Report Type page is now visible.
- Choose the appropriate Report Type then click Next.
- Select the columns you want on the report by cliking on a column name i.e. Ticket: #. Press and hold Control (Ctrl) keyboard key while selecting column names to select multiple columns.
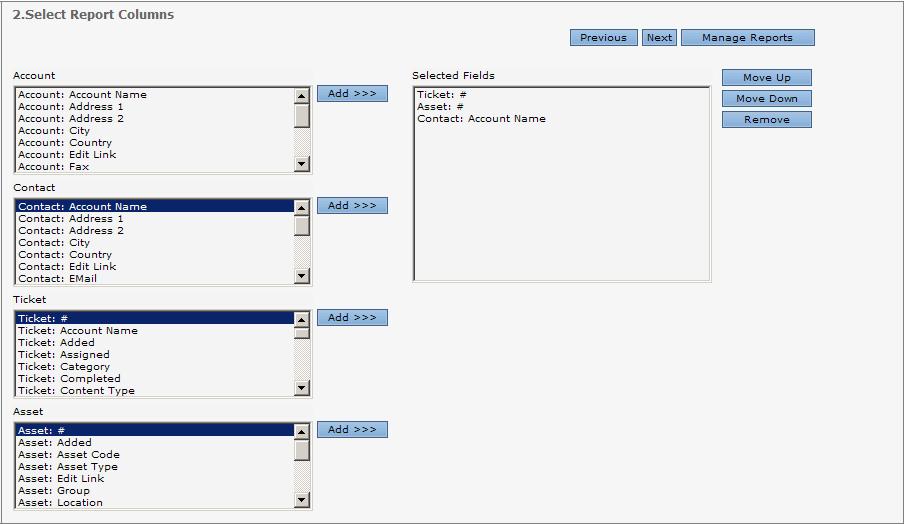
Note: This is not a full image of the information available to be reported on. Based on which module you are creating a report for, these will be different. For the Help Desk module, Peer Ticket, Child Ticket, and Parent Ticket information is now available to be reported on.
- Click Add >>> to add the column to the selected columns box.
- Click Next to go to the Column Properties page.
- Setup Column Properties for the desired report output.
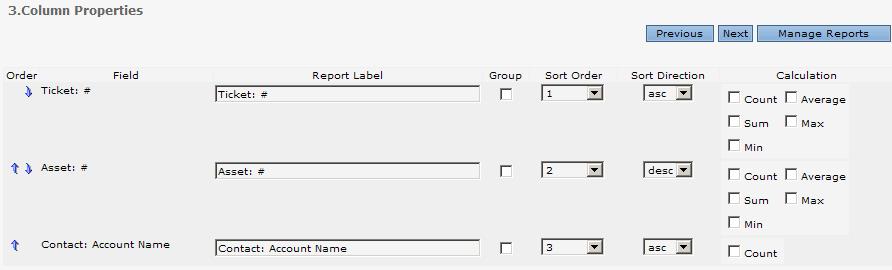
- Field order: Change the order the fields appear on the report. The order is from left to right on the report. The top field on the page is the first column on the left of the report. The next field on the page is the second column on the report…and so on.
- Field name: Field cannot be changed.
- Report Label: Change the column name to better suit your needs.
- Group: Allows the user to group the report by a particular field.
- Sort Order: Allows the user to set the order they want the fields sorted. When ‘1’ selected then the report will be sorted by that field first and so on. The number of sorting possible will be dependent upon the number of selected fields in the previous step. So if there are five (5) fields selected then the sort order scroll box will have the following options: 1 2 3 4 5.
- Sort Direction: Allows the user to select ascending or descending.
- Calculation: Only available if the field type is a number (date/time, integer or decimal) where calculations can be performed on the data. The types of calculations are Count, Sum, Average, Minimum, and Maximum.
- Click Next to go to the Select Report Filters page. Filtering the data is not mandatory for every report. It is up to the user whether or not the data on the report is filtered.
- Select the columns you want on the report by cliking on a column name i.e. Ticket: #. Press and hold Control (Ctrl) keyboard key while selecting column names to select multiple columns.
Note: The report can be filtered only by what records the user has permission to see. See the article Role Permissions for more information.
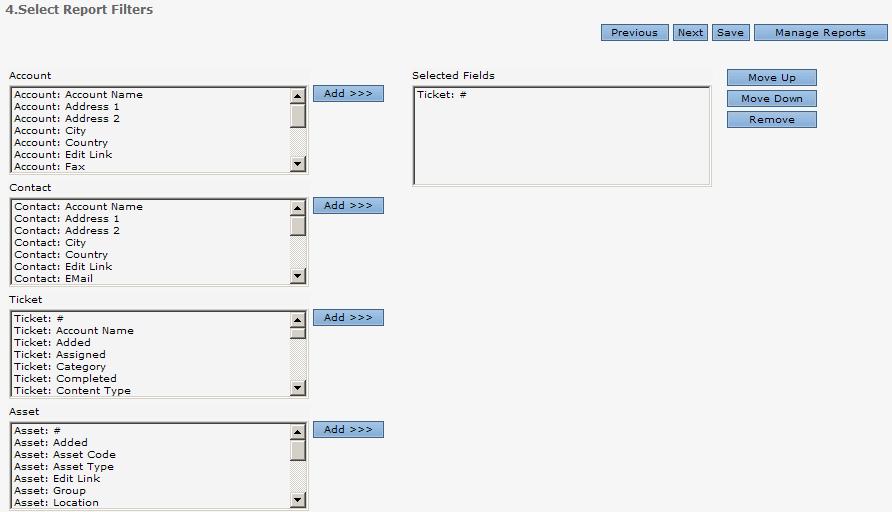
- Click Add >>> to add the column to the selected columns box.
- Click Next to go to the Define Filters page.

- Select Simple or Complex for the Filter Combination. Simple will be automatically defined for example if two columns are selected then the filter will be (1 AND 2). Complex is user defined and allows you to input OR logic into the filtering. See the Report Filters article for more information on using complex filters.
Note: Enabling the parameter option for a report filter allows the user to input the filter choices at the time the report is being ran.
- Click Next to go to the Setup Email Schedule page. To learn more about scheduling a report, see this article.
- Click Next to go to the Save page.
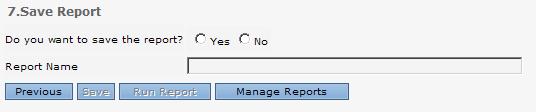
- Enter a report title.
- Click Save then Run Report to view the report.
Sub Articles
 Suppress Time Portion on Report
Report Filters Available within Report Writer
Report Filters Displayed on Report