Create Custom Rules for the Novo Knowledge Base
Purpose: How to create Knowledge Base custom rules.
Prerequisites: Novo Knowledge Base.
Steps:
-
Click Admin > Setup > Knowledge Base > Custom Rules.
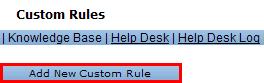
- Click Add New Custom Rule.
- The Custom Rule Definition window will appear
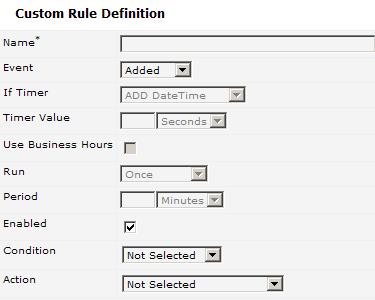
- Enter a Name for the rule.
- Choose an Event type from the drop-down list. The options are:
- Added - The rule will run when an Article is created, regardless of who created it.
- Modified - The rule will run when an Article is modified, regardless of who modified it.
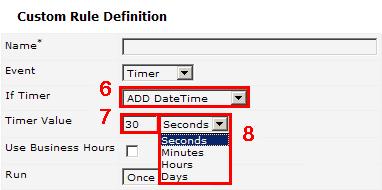
- Timer - Select from the following If Timer options:
- ADD DateTime - When the article was created
- EDIT DateTime - When the article was modified
- REVIEW DateTime - When the article was to be reviewed
- Article Feedback Received - The rule will run when an Admin or End user submits Feedback or a Vote for an Article. You can set the threshold vote level in conditions.
- Send for Approval - The rule will run when the Admin User saves an Article as a draft and clicks the Send for Approval button
- Article Comment Added - The rule will run when a User adds a Comment to an Article
- Select one of the IF Timer options shown above.
- Specify a Timer Value by entering a whole number in the adjacent field
- Specify Seconds, Minutes, Hours, or Days
Note: When the runtimerudr.bat runs (discussed below), the application will calculate the difference between the selected IF Timer option and the value in the Timer Value using the selected increment; (seconds, minutes, hours or days) and run the rule if the server DateTime has met or surpassed the calculated value.
- The Timer Value occurs as an interval
- Use Business Hours - Select this if you want the software to calculate timer based rules using the settings you provide on the Business Hours definition page. This control will only be enabled when Timer is selected for the Event type.
- Run - Determine whether a Timer rule should run only Once or Repeatedly. This control, and the Period control below, will only be enabled when Timer is selected for the Event type.
- Period - If you selected Repeatedly above, set the time interval the rule should repeat in Minutes, Hours or Days.
- Enabled - Uncheck this to disable the rule.
- Start Date/Time - works in conjunction with the End Date/Time to allow a rule to run for a specific time period.
- End Date/Time - works in conjunction with the Start Date/Time to allow the rule to run for a specific time period.
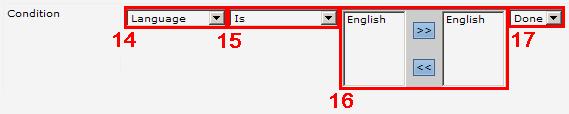
- Select a Condition. If no Condition is selected, the rule will run when the Add, Modify or Timer events occur. The following attributes are available:
- Access - List of predefined access types: Public, Portal View, Intranet, Group, and Private
- Author - List of article creators available under Admin>Permissions>Users
- Category - List of objects specified under Admin>Setup>Categories
- Editor - List of Admin users at Admin>Permissions>Users
- Content type - List of objects specified under Admin>Setup>Content Types
- Group - Groups defined under Admin>Permissions>Groups
- Language - Languages specified under Admin>Setup>Languages
- Portal View - List of objects defined under Admin>Setup>Portal Views
- Status - List of predefined statuses: Disabled, Enabled, and Awaiting Approval.
- Vote/Rate - List of possible Ratings:
- Poor
- Below Average
- Average
- Above Average
- Very High
Note: The choices above are the standard within Novo. You may have additional choices if you have added user defined fields.
- Select Is or Is Not to filter out articles where the condition matches a certain value; select Is Set or Is Not Set to filter out articles where the condition may or may not be Null
- Make a selection on which conditional value or values you want to be the trigger for the rule. Specify the condition by selecting the values you want from drop-down lists or multi-select lists. In the case of multi-select lists, you select the value by moving the required attribute to the right-hand box using the arrow buttons between the boxes. Some Text field types will offer the ability to enter "Contains" text.
- Indicate one of the following options:
- Done, if your condition is completed
- And, if you would like to add a condition where this condition "AND" the following condition must be true to trigger the rule.
- Or, if you would like to add a condition where this condition "OR" the following condition must be true to trigger the rule.
- Delete, allows you to delete the condition.
- Select an Action to be triggered by the rule. Available Actions are:
- Email Article To-
- Select from one of the following:
- Author
- Editor
- Group Support Recipients
- Super Admins
- Or enter an email address in the field just below the above select list.
- Enter a From Name
- Enter a Subject and Message as required
- Select a Link Type - the options are Admin, Public and None
- Choose whether to send the Article Content (rather than just the article link)
- If you choose to send content, choose whether to send attachments as well
- Choose whether to send Article Feedback - the options are: No, Most Recent, All
- Update Access To {any Access level} - Options are Public, Portal View, Intranet, Group, and Private.
- Update Status To {any Status} - Options are Disabled, Enabled, and Awaiting Approval.
- Update Portal View To {any Portal View}
- Update Group To {any Group}
- Update Content Type To {any Content Type that is visible in the Knowledge Base}
- Update Expire To {yes or no}
- Update Review Date To {any Date} - Options are Exact, Add, Edit, Review, Now
- Add WorkFlow {that is visible in the Knowledge Base}
Note: The choices above are the standard within Novo. The user may have additional choices due to user defined fields.
- Select a value for the second drop down
- In the right-hand drop-down list, select one of the following options:
- Done, if your Action is completed,
- And, if you would like to extend your Action,
- Or, if you would like to add an alternative Action,
- Delete, allows you to delete the condition.

Related Articles
 Assigning WorkFlows via Custom Rules