Additional Property Settings when creating an Asset
Purpose: When creating an asset, there are additional functions you can perform to the asset such as adding an attachment, adding an image, plus relating other assets, tickets, account, or contacts to the current asset.
Prerequisites: Novo initial software setting, Module Configuration, Assets created.
Steps:
- Attachments –Here you can attach any files which you consider to be useful for the asset you create (e.g. warranty information, scanned original purchase receipts, etc.).
- Click Attach Files.
- Enter the path to the file to be attached or click Browse to locate this file on your PC/network.
- Click Upload to attach the file to your asset.
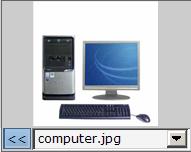
- Images –With this option, you can upload one or several pictures representing the current asset. To do so:
- Click Attach Images.
- Enter the path to your picture or click Browse to locate this image on your PC/network.
- Click Upload to attach the file to your asset.
- Now, the images you have attached will be visible on the Edit Asset form. If you have more than one image for an asset, you can switch between available pictures with arrow buttons next to the image.
- You can also take a look at images attached to an asset by clicking the Camera
 icon located in the row of every asset.
- Notes –With this function you can enter any notes concerning the current asset.
- Click Edit Notes. A new window will open.
- Click Add New Note.
- Enter the information you need into the Description field and click Save. In this window, you also have a possibility of viewing and editing the current asset with the help of the View Asset and Edit Asset buttons correspondingly.
- Related Assets –With the help of the Add Related Asset button you can assign other related assets to the current one. For example, you can relate a PC monitor to a specific PC, etc.
- Click Add Related Asset.
- A separate window will open where you have to mark check boxes in the row of appropriate assets.
- Click the Select
 button. The assigned asset becomes visible in the main asset’s window immediately.
 - Close the separate window, if you do not want to assign any further assets.
- Related Tickets –Click the Add a Ticket button to create a new ticket for the current asset. For more information on how to create a ticket, see related article, How to Create and Edit a Ticket. To assign to the current asset a number of other assets’ tickets, which are in some way related to the asset you are creating, click the Add Related Ticket button. A separate Manage Tickets window will open presenting all available tickets.
- Scroll down through the window or use search to locate the ticket you want to relate to your asset.
- Mark the check box in the row of the respective ticket.
- Click the Select button. The assigned ticket becomes visible in the main asset’s window immediately.
- Close the separate window, if you do not want to assign any further tickets.
- Related Accounts –Use the Add Related Accounts button to add to your asset some accounts related to the asset you are creating.
- Click Add Related Account. An Auto Complete field will appear.
- Start typing the name of the Account, when there are matches a drop-down will appear with suggestions.

- Click the appropriate suggestion.
- The Account is now associated with the Asset.
- Related Contacts –With the help of the Add Related Contact button you can relate to your asset contacts anyhow connected with this asset. To do so:
- Click Add Related Contact. An Auto Complete field will appear.
- Start typing the name of the Contact, when there are matches a drop-down will appear with suggestions.

- Click the appropriate suggestion.
- The Contact is now associated with the Asset.
After you have entered the desired information, click the Save button at the bottom of the page. Click Restart to erase all entered data and return the form to it's last saved state.