How to Create Custom Rules Based on Timer Events
Purpose: To create custom rules based on timer events.
Prerequisites: Steps to be automated.
Steps:
- Click on Admin->Setup->Requests->Custom Rules to open the Custom Rules window.
- Click on the Edit button to open the Custom Rule Definition window as shown below.
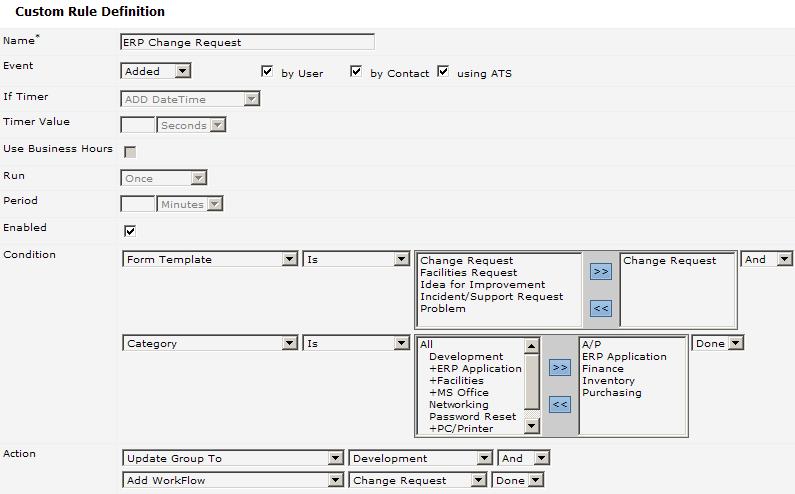
- Add a new Custom Rule by defining the parameters for the associated field types.
- In the Name field enter the name you want to assign to the new rule.
- In the Event field, select Timer.
- In the If Timer field, select the information you want to log.
- In the Timer Value field, enter the value and select the timer units from the drop-down list. This example uses 5 (value) minutes (units).
- Check whether you want to use Business Hours and whether you want to Enable the new custom rule.
- In the Condition field, select Account Type from the drop-down list, then the Is operator from the next drop-down list.
- For this example, select Customer Silver Level Support from the conditions list and click on the >> to move it to the selected conditions list.
- Select and operator from drop-down next pulldown list if you want to further qualify your rule. This example uses the And operator.
- A new section appears to define the next condition. This example uses Priority->Is->Medium or Low. Then, Done is selected from the drop-down list to complete the conditions for this rule.
- In the Action section, select Log Event As from the drop-down list. This example uses Informational from the next drop-down list to complete the first action selected, then uses the And operator to indicate that a second action should be performed when the conditions are met.
- The second level action, Email Ticket To, is selected from the drop-down list presented. The email address for the target recipient is added to the next field. The Done operator is selected to indicate that no more actions are required for this rule. You can enter information in the Subject and Message fields, which will be assigned as standard text to accompany each email sent to the target recipient.
- Click on Save to finish creating the new Custom Rule.