How to Set Up Account Types
Purpose: To setup Account types.
Prerequisites: Knowledge of the types of accounts available with your organization.
Steps:
Note: To use this feature, you must ensure that Account Types are enabled.
In Admin->Setup->Settings: Core/General->Contacts, select Enabled from the Account Types drop-down list.
Next, a new setup option appears (Account Types) in Admin->Setup->Account Types: Core/General.
- To create a new Account Type, follow the above path to the Account Types window.
- Click on the Add New Account Type button.
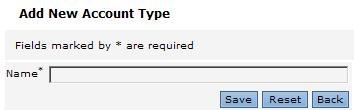
- Enter the Name of the account type that you want to create and click Save.
- If you need to change the Account Type name, click the Edit icon to open the Edit Account Type window.
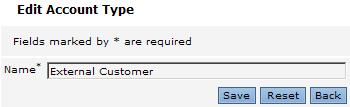
- Enter the new Name and click Save.
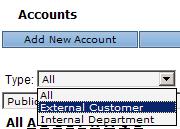
- Click Accounts in the main menu bar.
- In the Accounts window, you will see that the Type field is added to filters displayed.
Click on the Edit icon to select an Account for which you want to specify an Account Type. - Near the bottom of the Edit Account window, locate the Type field. Select the type that you want to assign to this account. For this example, the Silver Level type is selected.
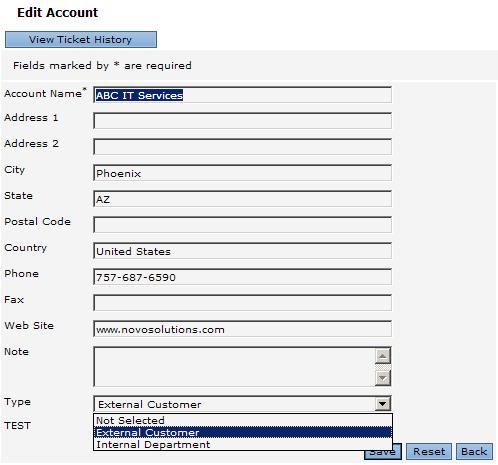
- Click on Save.