Editing a Request
Purpose: To edit a Request form. The Request from is used to capture pertinent information for a Requests.
Prerequisites: Admin Users must have the appropriate Role permissions to edit or modify a Request.
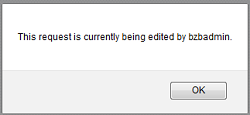
Note: This warning will be displayed when another Admin User is currently editing the same Request.
Buttons: The buttons displayed at the top and bottom of the Request form perform the following actions:
- Expand - unfolds Related Information (i.e. Related Articles, Attachments, Notes, etc,) at the bottom of the page so you can view the contents.
- Delete - allows you to delete the Request.
- Copy - allows you to create a copy of the Request. When you copy a Request, the new Request is assigned a new ID.
- Memorize - allows you to create a Memorized Request. A Memorized Request is used to:
- Create a Request for an issue that occurs frequently.
- Automatically generate a Request on a periodic basis.
- Manage Requests - closes the Request form and returns you to the Manage Requests page.
- View Request - opens the Request in a non-editible page.
- Send Request - displays the Send Request page so you can email the Request to the Contact or other individuals.
- Send Confirmation - displays the Send Confirmation page so you can send a confirmation email to the Contact.
- Save - saves changes made to the Request form.
- Save & Exit - saves changes, closes the Request form, and returns you to the Manage Requests page.
- Save, Exit & Notify - saves changes, closes the Request form, and displays the Send Request page so you can send an email notification to the Contact.
- Reset - removes all edits and returns the form to its previous state at the point of the last save.
- Form Template List - allows you to choose different Request templates based on request types.

Request Information:
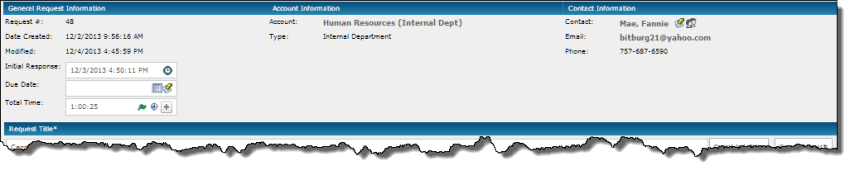
- General Information:
- Request # - system generated ID that is unique to each individual Request.
- Date Created - date/time stamp when the Request was added.
- Modified - displays the date/time the Request was last saved.
- Internal - check this box if you do not want the Request to be displayed in the Public Interface
- Initial Response - optional date/time field that can be used to determine when someone initially responded to this Request. Note: The date/time is updated each time you click in the field.
- Due Date - optional date/time field that allows you to set a due date for the Request.
- Total Time - optional date/time field that allows you to record amount of time spent on a the Request.
- Note: Starting in version 5.2 the auto timer will stop when the Request is Saved & Closed
- Account Information - displays the Account information of the Contact that is related to the Request.
- Contact Information - displays the information of the Contact that is related to the Request. This is the person who submitted the Request.
Request Fields:
- Information displayed in this area is dependent on the following:
- Configuration settings in Admin->Requests->Settings->Display Settings allow you to determine which predefined fields are displayed on the Request form.
- User Defined FIelds (UDFs) - when creating UDFs, you can decide to display them on the Request form.
- If using Request templates, you can decide which predefined and user defined fields are displayed on the Request form.
- Your organizational needs will determine which predefined and user defined fields are needed to capture the necessary information for each Request.
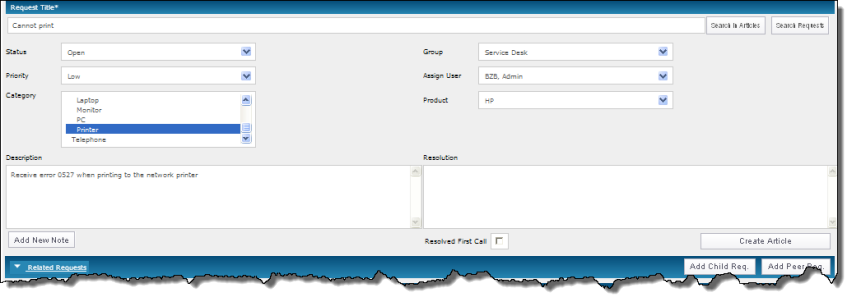
- Predefined Fields:
- Request Title - enter brief bullet statement that describes the nature of the Request.
- Search in Articles button - displays the basic search window to search information in the Knowledge Base (if purchased).
- Search Requests button - displays the search request window to search information in the other Requests.
- Status - defines the current state of the Request
- Priority - determines the order in which the Request is processed.
- Product - used to identify a brand name, manufacturer or type of equipment.
- Category - used to classify the type of Request.
- Content Type - similar to Category where you can classify the Request by type.
- Group - assigns a specific Admin Group that is responsible for the Request.
- Assigned User - assigns a specific Admin User that is responsible for the Request.
- Description - used to enter additional details to explain or describe the circumstances surrounding the issue.
- Resolution - used to document action taken to resolve the Request.
- Add New Note button - used to provide additional information about the Request.
- Resolved First Call - a flag to identify that this Request was resolved on the first call.
- Create Article button - if you purchased the Knowledge Base, this is a quick way to create an Article from the Request. See Create an Article from a Request.
- User Defined Fields:
- Used to capture additional information for the Request that cannot be entered in predefinded fields.
- User Defined Fields are only displayed if they have been enabled on the appropriate Request Template.
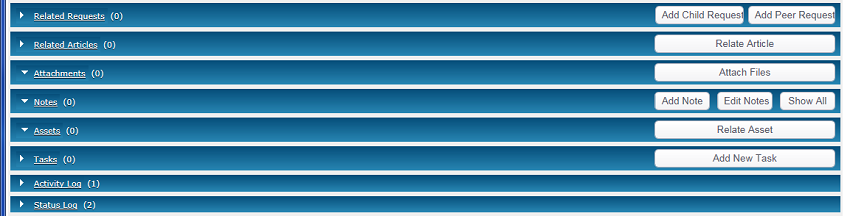
Related Information: Note: Starting in version 5.2 Comments entered by Admin or Public Users will be recorded in the Notes section and System Generated Notes (i.e. custom rules, reassignments, etc.) will be recorded in the Activity Log. The number of items in each section will be displayed in parenthesis.
- Related Requests
- Click Related Requests to see a list of Requests with a Parent/Child or Peer relationship.
- Add Child Req. button - allows you to create a Parent/Child relationship between Requests.
- Add Peer Req. button - allows you to create a Peer relationship between Requests.
- Related Articles (displayed if the Knowledge Base was purchased)
- Click Related Articles to see a list of Knowledge Base Articles that are related to the Request.
- Relate Article button - allows you to select Articles from the Knowledge Base and relate them to the Request.
- Note: You can also create a custom rule to automatically relate an Article to a Request based on certain conditions. You'll need the Article Id when creating the custom rule.
- Attachments
- Click Attachments to see a list of files that are attached to the Request.
- Attach Files button - allows you to attach files to the Request.
- Delete Files button - allows you to delete multiple attachments at the same time.
- Select the desired files then click the Delete Selected Files button.
- Notes
- Click Notes to see additional information about the Request. Also provides a transaction history of the Request.
- To add additional information to the Request, click the Add New Note button below the Description field.
- Notes entered from the public interface or replies from the Novo Mail Service will also be displayed in this section.
- Notes with a check mark in the Internal column can only be viewed by Admin Users.
- Edit Notes button - allows you to add a new note, edit an existing note, or delete a note.
- Show All button - expands the Notes section.
- Assets (displayed if Asset Manager was purchased)
- Click Assets to see a list of Assets that are related to the Request.
- Relate Asset button - allows you to select Assets from Asset Manager and relate them to the Request.
- Tasks (displayed if Workflows was purchased)
- Click Tasks to see a list of Tasks associated with the Request. Also displays the WorkFlow drop down list and Add WorkfFow button.
- Add New Task button - allows you to add Tasks on the fly to the Request.
- WorkFlow drop-down list - allows you to select a predefined WorkFlow.
- Add WorkFlow button - adds the selected WorkFlow to the Request.
- Activity Log
- Displays system generated Notes for the Request.
- Displays actions taken by Custom Rules.
- Status Log
- Displays a record of each status change for the Request.
- The log displays the status and when it was changed.
Send Request: - The Send Request page is displayed when you click one of the following buttons.
- Send Request - allows you to email the Request to the Contact or other individuals.
- Send Confirmation - allows you to send a confirmation email to the Contact.
- Save, Exit & Notify - allows you to send an email notification to the Contact.
- Send Request page information.
- Select From Address - allows you to select an email address if the Novo Mail Service is configured with multiple addresses.
- To and CC - can enter multiple email addresses (supports up to 1000 characters)
- Subject - populated from the Request Title with the Request # in brackets.
- Include Notes - you can choose to not include notes based on the following options:
- None - notes are not included in the email notification.
- All - both internal and external notes are included in the email notification.
- Exclude Internal - notes marked as internal are not included in the email notification.
- Most Recent Public - includes only the most recent note in the email notification. Note: Using this option reduces "clutter" and excludes unnecessary information in the email notification.
- Include Related Articles (if the Knowledge Base was purchased) - you can choose not to include related Articles, include the Articles as content in the email, include a public link to the Articles, or include an Admin link to the Articles.
- Message - populated from the configuration settings in Admin->Setup->Requests->Settings->Email Settings section and will appear in the body of the email notification.
- Link Type - you can choose to not include an link or include an Admin or Public link to the Request in the email notification.
- Admin Edit - choose this option to allow an Admin User to open and edit the Request.
- Admin - choose this option to allow an Admin User to view the Request (non-edit mode).
- Public - choose this option to allow a Public User to view the Request (non-edit mode).
- None - choose this option if you do not want to include a link to the Request.
- Send Request Information - Allows you to include or exclude Request information in the email notification.
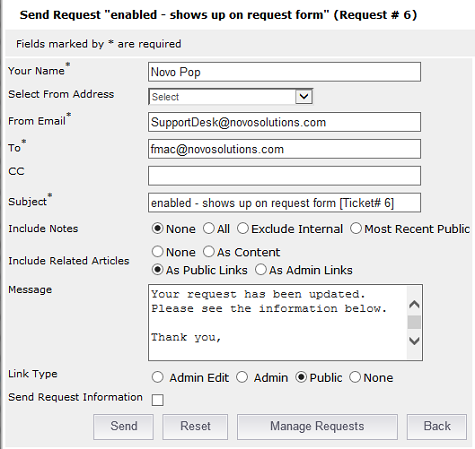
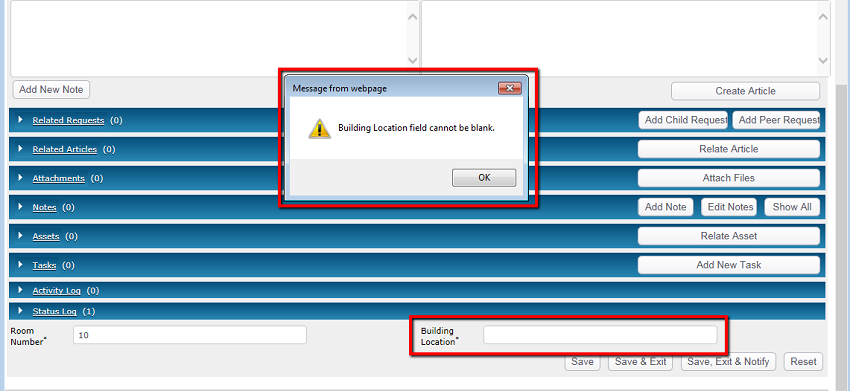
Required fields
- Required fields are identified by an asterisk "*" after the field label
- A dialog box is displayed with the field name if you attempt to save a Request without filling in the Required field information