Creating Tasks for an Article
Purpose: You can create ad hoc tasks on the fly for a Article. Creating tasks directly from the Article form allows you to manage and control different units of work or activities that are associated with the Article.
Prerequisites: Admin Users must have the appropriate Role permission to create or modify Tasks.
Steps to create Tasks for a Article: - Click Article to open the Manage Articles page.
- Create a new Article or select the Edit icon to open an existing Article.
- Scroll down to the bottom of the form and click the Add New Task button to display the Task form.
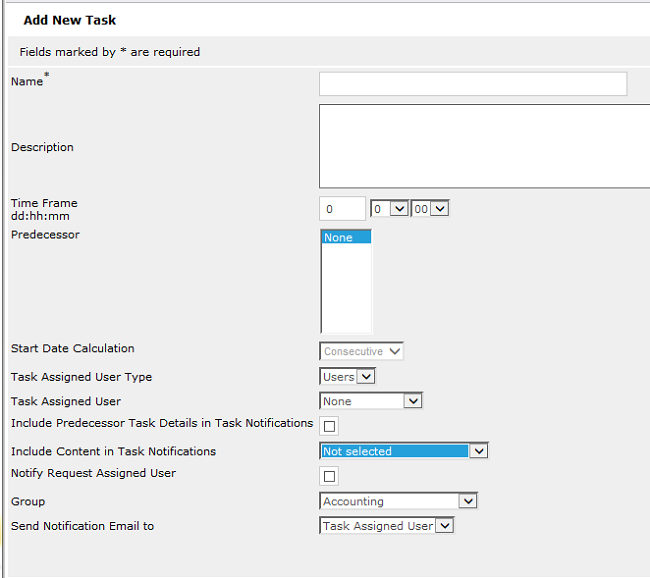
- Enter the appropriate information in the Task form.
- Name (Required) - enter a name for the task.
- Description - if necessary, enter additional information about the Task.
- Time Frame
- You can set the duration of the task in days, hours, and minutes.
- The duration adds to the start date and automatically calculates the due date.
- Predecessor - select a predecessor task or choose None.
- Start Date Calculation - used to calculate the due date.
- Task Assigned User Type
- Users - select this option if assigning the Task to an Admin User.
- Contacts - select this option if assigning the Task to a Contact.
- External - select this option if assigning the Task to a person that is not listed as an Admin User or a Contact.
- Task Assigned User - allows you to assign the Task to a specific Admin User if Users is selected as the Task Assigned User Type.
- Contacts - click the Add Contact button to assign the Task to a specific Contact if Contacts is selected as the Task Assigned User Type.
- External Email - enter the email address of a person that the Task is being assigned to if External is selected as the Task Assigned User Type.
- Include predecessor Task Details in Task Notification - used if a predecessor Task needs to be completed before this Task. Check this box if you want the task details of the predecessor Task to be inluded in the email task notification.
- Include Content in Task Notifications
- Admin link - inserts a hyperlink to the Article.
- Public link - inserts a hyperlink to the View Article page.
- Admin link with Content - inserts a hyperlink to the Edit Article form along with Article information.
- Public link with Content - inserts a hyperlink to the View Article page along with Article information.
- Content only; with no link - inserts Article information into the task Notification.
- Notify Article Owner - sends an email task notification to the Article Owner.
- Group - specifies the Group that is responsible fo the Task.
- Send Notification Email to: - displayed only if Users is selected as the Task Assigned User Type.
- Task Assigned User - sends an email notification to the Admin User that is assigned to this Task.
- Group - sends an email notificiation to Admin Users in the specified Group.
- Click Save to return to the Article.
- To create additional Tasks for the Article, repeat step 4.