How to Log Custom Rules
Purpose: Using Log as Event in Custom Rules.
Prerequisites: Novo initial software settings, Module Configurations, Custom Rules to be tested.
The Request Manager includes a feature that allows you to track the execution of custom rules. You can record a list of all custom scheduled actions in a separate log file.
Steps:
- Go to Admin > Setup > Requests > Custom Rules. Click on the edit icon
 to select the Custom Rule for which you want to turn on logging.
 - To activate the logging feature, select the Log Event As option from the Action drop-down list when you create or edit your custom rule.
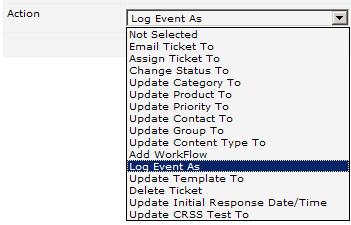
- After selecting the action, additional fields—Log Type and Logical Condition—will appear in the Action section.

- From the Log Type list, select one of the possible types for your log: Informational, Warning or Failure.
- From the Logical Condition drop-down list, select Done, if your action is ready, or And if you would like to qualify your action with further conditions.
- Click Save.
- Now, the execution of your custom rule will be logged. To view the log, go to Admin > Setup > Requests > Custom Rules. Click the Requests Log link.
- The Requests Log page will open displaying all the logged custom rules.
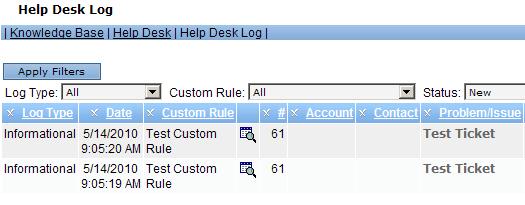
- You can sort the logs by all columns, or you can use the filters at the top of the table to narrow your log display. By clicking the View icon
 , you can take a look at the ticket associated with the current problem/issue.