How to Create New Request Templates
Purpose: To create a new Request template. Request templates allow you to capture specific information for different scenarios.
Prerequisite: Admin Users must have "Manage Requests Form Templates" checked in their respective Role.
Steps:
- Click Admin->Setup->Requests->Request Templates.
- Verify Requests is selected on the menu bar. The Request Templates window will open, presenting all Request templates available in the system.
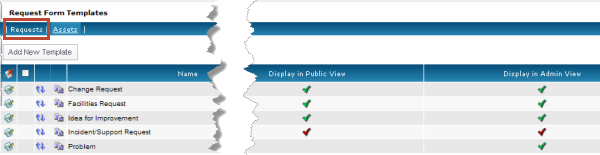
- Click the Add New Template button to display the Add New Template pages.
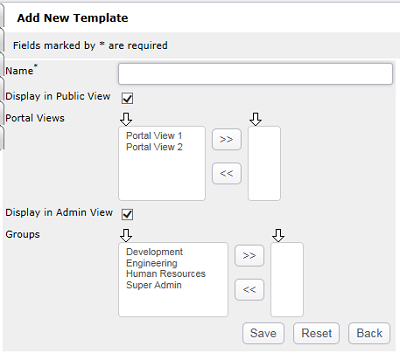
- In the Name text box, enter the name for your new Request template.
- Display in Public View - check this box if you would like this template to be displayed for Public Users.
- You can assign certain Portal Views to this Request Template. Only Public Users with the assigned Portal Views will be able to see this template.
- Display in Admin View - check this box if you would like this template to be displayed for Admin Users.
- You can assign certain Admin Groups to this Request Template. Only Admin Users with a Role in the assigned Group will be able to see this template.
- Click "Save" to Continue.
- Click the Field Ordering icon to open the Field Ordering screen for the template.
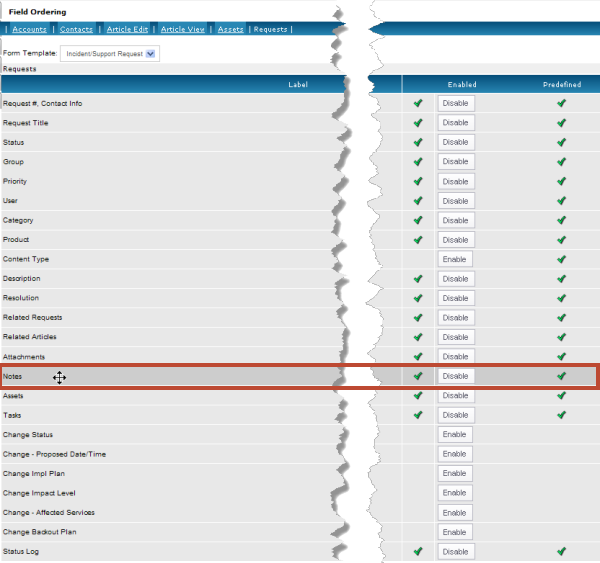
- By default all predefined fields are enabled and user defined fields are disabled.
- To hide a field on the template, click the Disable button for the respective field.
- To display a field on the template, click the Enable button for the respective field.
- Beginning with version 5.0 the field ordering icons have been replaced with the drag-and-drop method. To reposition a field, place your cursor on a row until it turns into a 4-headed arrow. Hold down the left mouse button and drag the field to its new position then release the left mouse button.
To Copy a Template
- Navigate Admin>Setup>Help Desk: Request Templates
- Click the Copy button

- Rename the Template
- Press "Save" to Continue
Related Articles
 How to create a customized default Request template