Using the Attach Files Feature
Purpose: Allows you to post relevant files to provide additional information or support your Article Content.
Prerequisites: Attaching a file requires the Admin User to have the "Add/Edit Article" permission enabled.
Note: Beginning with version 5.0 you can simultaneously attach up to five files at the same time. We've also added an Attachment Store where you can house attachments to be reused with other articles. This eliminates the need to upload the same attachment multiple times.
Uploading an attachment directly from your workstation or shared directory:
- You can attach files in one of two ways:
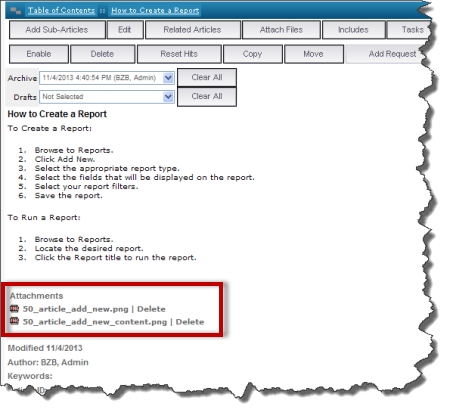
- Select the desired Article from the Navigation Tree then click the Attach Files button on the Article Options Bar.
- When editing an Article, click the Save & Attach button at the bottom of the page.
- The "Add File(s) to Article" page will be displayed.
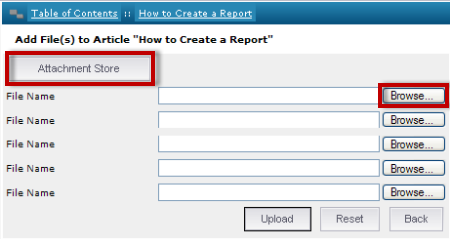
- Click the Browse button to display the "Choose File to Upload" dialog box.
- Navigate to the desired file on your workstation or shared directory.
- Click the file to select it, then click Open to close the "Choose File to Upload" dialog box.
- If you need to attach additional files, repeat steps 3 - 5. You can upload up to five files at one time.
- Click the Upload button to upload the file to the web server and attach it to the Article.
Uploading an attachment from the Attachment Store:
- You can attach files from the Attachment Store in one of two ways:
- Select the desired Article from the Navigation Tree then click the Attach Files button on the Article Options Bar.
- When editing an Article, click the Save & Attach button at the bottom of the page.
- The "Add File(s) to Article" page will be displayed.
- Click the Attachment Store button to display a list of attachments that have already been uploaded to the web server.
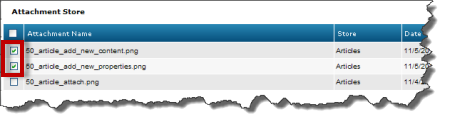
- Select the desired file by checking the box to the left of the file name.
- Note: If the desired file is not in the Attachment Store, an Admin User with "Manage Articles Attachment Store" permission can upload the file and make it available in the Attachment Store.
- Click the Save button to attach the file to the Article.
Replacing a File in the Attachment Store
By clicking the Replace icon, you can replace an existing file with and update version.
- In the Attachment Store locate the file you want to replace.
- Click the Replace icon.
- Click the Browse the button to locate the updated file.
- Click Upload.
- The previous file is removed and the new file is uploaded in its place. The relationship between any Articles, Accounts, Assets, Contacts, or Requests are updated with the new file.
Below are some common errors encountered when working with attachments in the Novo software:
- 007~ASP 0104~Operation not Allowed~ (when uploading files) or VBScriptError: File not found (Error 1040) Error opening 'C:\xxx\yyy.ext. Error 32 The process cannot access the file because it is being used by another process (when downloading)
- By default the web server does not allow attachments larger than 204k (approx) to be uploaded. There is a similar restriction on downloads. See the related articles below for instructions on how to change the upload and download limits.
- Object Required
- Re-register the upload componant:
- Open a command prompt and type cd c:\path_to_the_software\com\ (i.e. c:\Program Files\novo\com)
- type: regsvr32 aspSmartUpload.dll
- Ensure that there is a copy of aspSmartUploadUtil.dll in the c:\windows\system32 folder (there is no need to register it)
- File not found: aspsmartuploadutil.dll
- Ensure that there is a copy of aspSmartUploadUtil.dll in the c:\windows\system32 folder (there is no need to register it)
Related Articles
 Unable to upload or download large attachments