Configuring Due Dates for Requests
Purpose: To explain how to configure due dates for Requests.
Prerequisites: Request Manger.
Steps:
- On the edit Request form, notice the Due Date row at the top of the page under the General Information section.
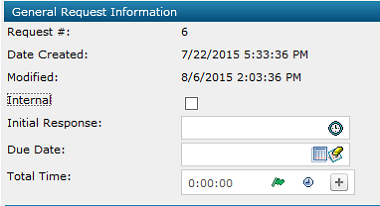
- Click
 to set the date
- Once the due date is set, the date and time will appear next to the heading Due Date plus the background will appear green in color.
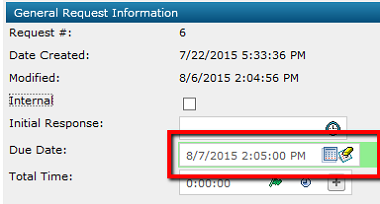
- If the due date has passed, the background color will change to red.
Note: The same colors will appear as the background of the Due Date column on the Manage Requests page.
Auto Due Date Change
This feature allows the Due Date to change automatically when the status of a Request is changed. For example, let's say a Request was created on 7/01/2015 with a due date of 7/03/2015. Before further action can be taken on the Request, you need additional information from the customer. Two days later on 7/03/2015, the customer eventually responds with the needed information. In this scenario the Due Date should be changed to 7/05/2015 to compensate for the additional time it took for the customer to respond. You can either edit the Request and manually adjust the Due Date or have it adjusted automatically.
To Auto Change the Due Date:
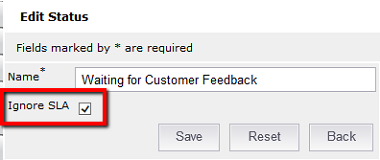
- Create a status with a name of "Waiting for Customer Feedback" or a name of your choosing. Check the "Ignore SLA" checkbox and click Save.
- Browse to Admin > Requests > Settings. In the Other section, enable "Allow Auto due Date Changes Based on Status." If you are using Business Hours you should also enable "Use Business hours for Due Date Changes."

- What happens next?
You can create a Request, enter a Due Date, and assign it a status where "Ignore SLA" is checked. When the status is changed, the Due Date will change automatically.