Recurring Scheduled Requests
Purpose: To explain the process of creating and scheduling memorized Requests.
Prerequisites: Novo Request Management
Steps:
Creating Scheduled Requests
- In the Request Management application, select or create a Request that you want to be created on a regular basis
- Click the Edit icon
 to open the desired Request
 - Save the Request as a *Memorized* Request by clicking the
 button
 - The Request will be copied to the Memorized Request with all the fields that are enabled on the request's template
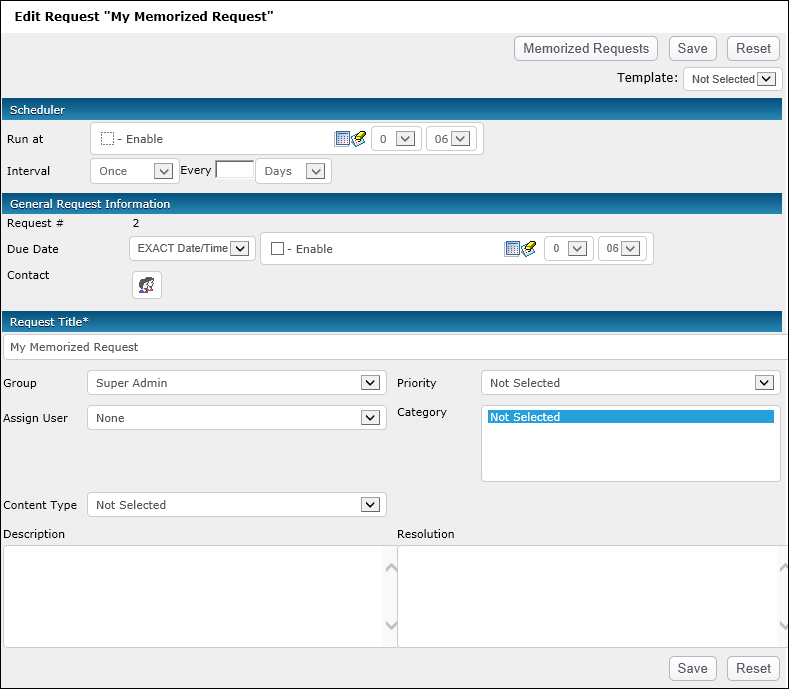
- To schedule the Memorized Request, check the Enable box in the Run at field; you can set the start date and time
- Use the Interval drop-down list to specify whether the Request should be scheduled "Once" or on a "Re-occuring" basis
- If the Request will be scheduled on a "Re-occuring" basis, enter a number into the "Every" field and select from Days, Weeks, Months or Years
- Due Date can be set to {NOW} or a date calculation
- Fill in the General Request Information as necessary
- Click the Add Contact icon
 to assign a Contact
 - Press Save to store the information
Scheduling Memorized Requests
Edit the runmemorized.bat batch file on the web server to match your Virtual Directory path. This file is found in the Novo app's file system; (i.e. C:\Program Files\Novo\app\com\) Below is the default runmemorized.bat file. The line with wget.exe is the run command:
rem This is the bat file for Rules timer actions
rem
rem Parameters: %1 - virtual path to KB, for example http://localhost/kb43
rem
wget.exe -q %1/runtime/runmemorized.asp
The last step is to schedule the runmemorized.bat batch file; Use the Task Manager in Windows to schedule a task to run the runmemorized.bat file periodically (for example, 1–5 minutes)