Creating an Account
Purpose: To explain the process of creating an account.
Prerequisites: Novo initial software settings.
Steps:
- Go to the Accounts page by clicking the
 link on the top toolbar.
 - Click
 . The window below will appear:
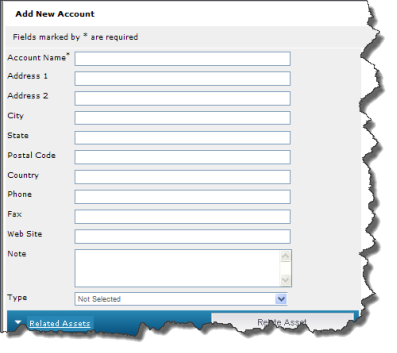
- Provide at least the Company Name of the Account.
Note: If you specify Contact information here, it will populate the Contact records when you create them.
- If Account Types are enabled, select an Account Type. Use Account Types to help organize accounts into different categories (i.e: Vendors, Suppliers or Customers, etc.). Then you can filter the Accounts list to just display one Type.
- Account Types are enabled in Admin->Settings
- Once enabled, create as many Types as you want in Admin->Account Types.
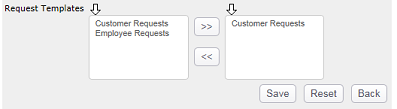
- You can choose which Request Templates can be used by this Account.
- Click the Save button.
- Once the Acount has been created, you can relate Assets or Requests, images, attach files, or add Notes to the Account record.
Note: At least one Contact must be created under the Account before a Request can be related.